Suspension Setup Basics
Date Posted:12 July 2024
Did you get a new bike, fork, or shock and need to get it up and running smoothly? Hopefully, this helps!
Sag, Rebound, Compression, High and Low-Speed dials, etc etc... Setting up suspension can be confusing and frustrating. We've all been there at one point.
The correct setup can give you confidence, reduce fatigue, and have you smiling from ear to ear. On the flip side, poorly set suspension can destroy your confidence and leave you not wanting to ride. Nobody wants that!
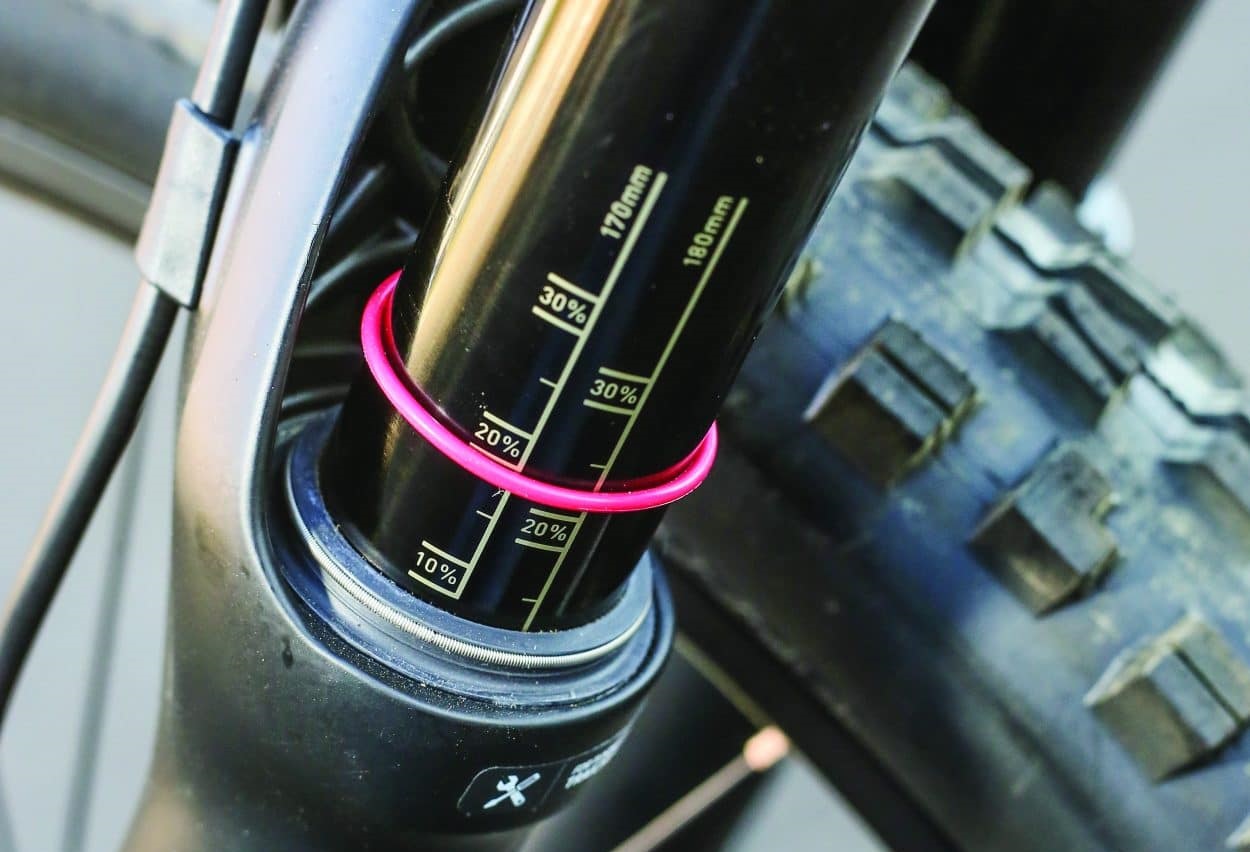
Sag: The amount the suspension compresses under your body weight.
- As a good starting point we suggest 30% for the rear and 20% for the front
- Set the rear sag by sitting on the seat in a neutral riding position.
- Set the front by standing in a neutral standing position.
- Bounce up and down a few times and let the suspension settle before you take your measurement.
- Most modern suspension has sag markings printed on them to make things easy.
- If your suspension has no markings you will need to use a tape measure or ruler to measure the amount of sag. For example, a rear shock with a 50mm stroke will have 15mm of sag at 30%, and a 150mm fork will have 30mm of sag at 20%.
- Adjust the air pressure by 10 psi at a time until you get the desired amount of sag.
- To adjust the sag on a coil shock you can adjust the spring preload. For larger changes, you may need to change the spring to a firmer or softer version.
- Gear up in your regular riding kit to set the sag including armour, hydration packs etc.
Rebound: Controls the speed the suspension returns at after compression.
- If your rebound is too fast your bike will bounce and feel unstable.
- If your rebound is too slow your bike will "pack down", perform poorly, and bottom out.
- Generally, we suggest your run your rebound as fast as you are comfortable with.
- Make small adjustments, test, and repeat until you find a setting you are comfortable with.
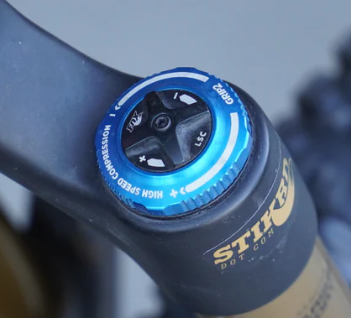
High and Low-speed compression: This refers to the speed the suspension is moving not the speed you are riding.
- High-speed compression will be noticed the most on bigger impacts. Think jump landings and hitting square edges and rocks at speed.
- Low-speed compression has the most impact in the mid-range of travel. Most noticeably on jump faces, corners, and steep terrain.
- Bottoming out on jump landings even though your sag is correct? Increase your high-speed compression
- Does you bike feel like it is diving in corners and on steep terrain? Increase your low-speed compression.
- Adding low-speed compression will reduce small bump sensitivity.
- Generally we suggest starting with your high and low-speed compression wide open as a starting point.
Bonus info!
- The all-round perfect suspension setup doesn't exist. You have to compromise somewhere. A bike setup for race speed won't feel great cruising around and vice versa.
- Rider weight, Riding style, and the varying terrain we have in Australia all have an impact on your setup.
- Volume spacers can help if you find yourself bottoming out your suspension regularly with the correct sag settings.
- Baseline settings are just a starting point, don't be afraid to experiment and test other settings. As an example, the ORBO team finds running a little extra sag on a Revel with the CBF suspension setup helps it perform better in most cases.
- Service your suspension! All the setup time in the world won't help if your suspension isn't performing as it should.
- A quality shock pump is an essential part of any MTBers toolbox. We recommend the KS Air 8